Friday, March 1, 2019
Behind the Scenes - creation of Dobby
I wanted to post some photos of the creation of HP Dobby's character. I used recycled materials and paper mache to create him.
Step 1: gather plastic soda bottle, masking tape, styrofoam plates, newspaper, and plastic easter eggs.
Step 2: Crumble newspaper and place on bottles with lots of masking tape. Trace two elf ears from styrofoam plates and attach to head. I also attached the plastic easter eggs for eyes. Shape head and ears as needed by adding more newspaper and masking tape.
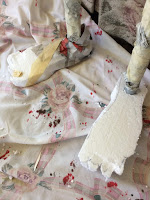
Step 3: I added some pvc pipe for the legs and tried to make him at least 3 ft. I traced my foot and cut out feet from styrofoam.
Step 4: To make it easier to work with, I attached him to a piece of styrofoam. It wasn't very sturdy, but it helped with keeping him upright. I added more newspapers and shaped his feet. His arms were made with wire. Once the skeletal part of the body is assembled, all you need to do is add newspaper and masking tape to shape body.
Step 5: Arms were sculpted with some cardboard and shaped with newspaper and masking tape. Once he was shaped, I added strips of newspapers with paper mache paste (www.ultimatepapermache.com).
Step 6: Ready for paint. Actually, before painting, I added a coat of gesso.
"Look away, children!" Dobby looked pretty scare in this phase.
It tooks a few attempts at painting until I was satisfied with how he looked.
Every respectable elf needs to be covered. I added two pieces of linen tied on the top. I handsewn the sides and ta da!
Last step: Glue Dobby to a piece of scrap wood. I started this project during the summer (2018) and was made with materials I had on hand. Basically, Dobby was FREE!
Subscribe to:
Post Comments (Atom)


No comments:
Post a Comment
Thanks for leaving a comment. It sure makes my day!